Getting your YouTube video dimensions right is one of those things that separates uploads that look polished from ones that arrive letterboxed, pillar-boxed, or — worst of all — quietly cropped by the platform without you noticing. Whether you’re recording a homelab walkthrough in landscape or shooting a quick vertical clip for the Shorts feed, the pixel dimensions and aspect ratio you choose at export time directly affect how your video displays across every device YouTube supports. This guide breaks down the exact specs you need for both standard horizontal uploads and Shorts, along with the codec, bitrate, and safe-zone details that actually matter.
Why YouTube Video Dimensions Matter More Than You Think
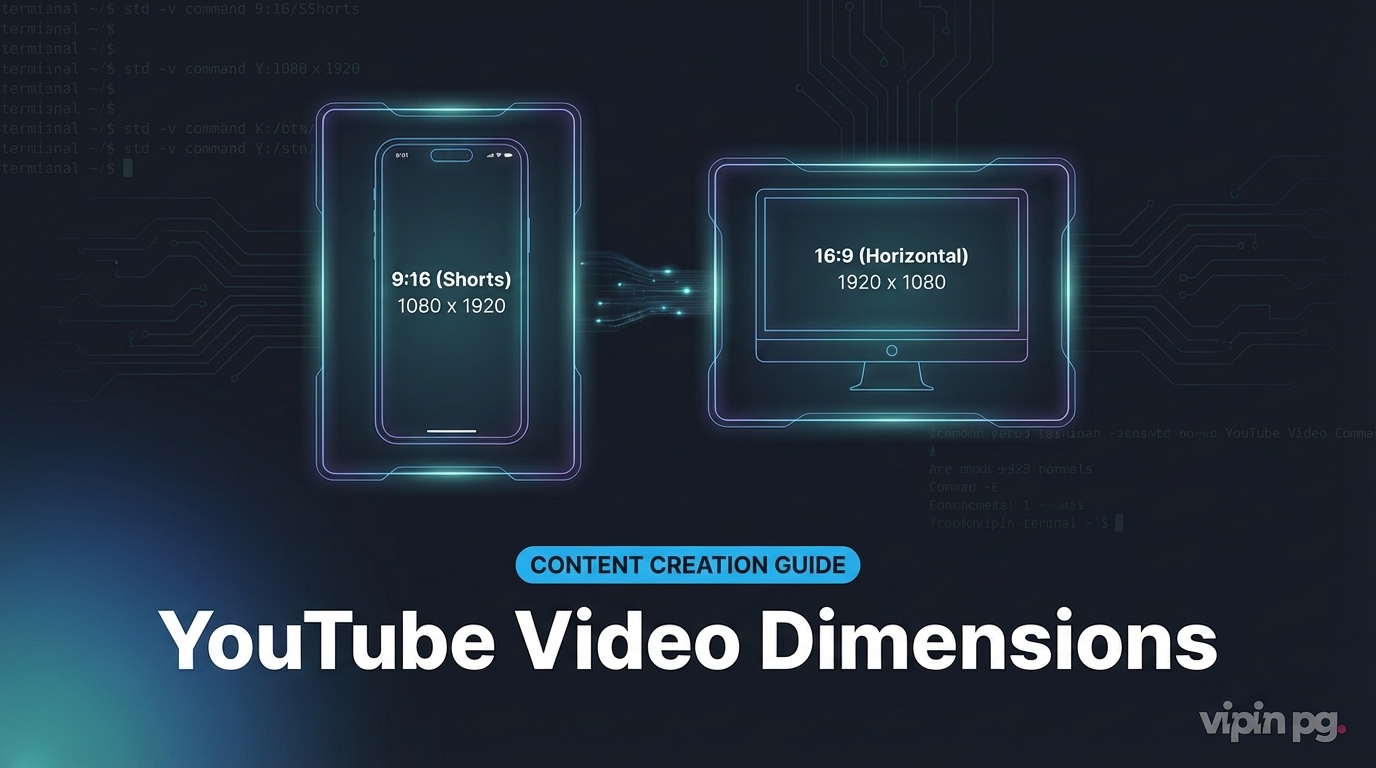
YouTube’s video player is built around the 16:9 widescreen aspect ratio for horizontal content. When you upload a video that doesn’t match that ratio — say a 4:3 clip from an older camera or a square 1:1 export — YouTube pads the frame with black bars to force it into a 16:9 container. The result looks amateurish, and it wastes a significant portion of the viewer’s screen real estate.
For Shorts, the situation is reversed. The Shorts feed is a vertical-first, mobile-first surface. Upload a horizontal video and YouTube will either add black bars to the top and bottom or, in some cases, refuse to classify the content as a Short at all. Since the Shorts and regular video algorithms treat content differently, landing in the wrong category can significantly limit your reach from day one.
The good news: once you know the two primary dimension targets — 1920×1080 for horizontal and 1080×1920 for Shorts — you can configure your video editor’s export settings once and forget about it for most projects.
Standard Horizontal YouTube Video Dimensions (16:9)
The vast majority of YouTube content is horizontal, intended for desktop browsers and TV apps where the player fills a widescreen frame. YouTube’s native player ratio is 16:9, meaning 16 units of width for every 9 units of height.
Recommended Resolutions for Horizontal Uploads
YouTube supports a wide resolution range, from 240p all the way to 8K. Here are the ones worth knowing:
| Resolution Name | Dimensions (W×H) | Aspect Ratio | Notes |
|---|---|---|---|
| 8K UHD | 7680×4320 | 16:9 | Maximum supported; requires capable hardware to edit |
| 4K UHD | 3840×2160 | 16:9 | Preferred for high-quality content; boosts algorithmic recommendations |
| 1440p (2K QHD) | 2560×1440 | 16:9 | Good middle ground between 1080p quality and 4K file size |
| 1080p Full HD | 1920×1080 | 16:9 | The recommended standard for most creators |
| 720p HD | 1280×720 | 16:9 | Acceptable minimum; noticeably softer on large screens |
| 480p SD | 854×480 | 16:9 | Supported but explicitly not recommended; avoid if possible |
For most content creators — tutorials, reviews, homelab build logs, gear unboxings — 1080p (1920×1080) is the practical sweet spot. It renders crisply on desktop monitors and modern TVs, produces manageable file sizes, and doesn’t require an editing workstation with 64 GB of RAM. If you’re filming screen recordings or dense technical content where small text needs to be readable, 1440p is worth the extra file size.
Pro Tip: YouTube’s internal data suggests that 4K uploads receive meaningfully more impressions in suggested video feeds compared to equivalent 1080p videos. If your camera shoots 4K natively, upload the full-resolution source rather than downscaling — even if most viewers end up streaming at 1080p, the algorithm still treats the upload as a 4K file.
Format and Codec Specs for Horizontal Videos
YouTube accepts several container formats, but the combination that reliably produces the smallest files with the best quality is MP4 with H.264 video codec and AAC-LC audio. Most consumer editors — DaVinci Resolve, Premiere Pro, CapCut Desktop — default to exactly this combination when you select a YouTube export preset.
- Container: MP4 (preferred), MOV, AVI, WMV, FLV, WebM, MKV also accepted
- Video codec: H.264 (recommended) or H.265/HEVC for better compression at 4K+
- Audio codec: AAC-LC, MP3, or Opus; stereo or 5.1 surround
- Frame rate: Match your source — 24, 25, 30, 48, 50, or 60 fps; do not convert unnecessarily
- Bitrate (1080p): 8 Mbps minimum for standard frame rate; 12 Mbps for 60fps content
- Max file size: 256 GB or 12 hours, whichever comes first
One thing worth remembering: YouTube re-encodes every upload on its servers. Uploading at a higher bitrate than the minimums above gives the encoder more data to work with, which generally means fewer artifacts in the final stream — especially in high-motion scenes.
YouTube Shorts Dimensions and Aspect Ratio (9:16)
YouTube Shorts are built entirely around mobile consumption. Viewers hold their phones vertically, the Shorts feed auto-plays videos in a full-screen vertical stack, and the algorithm treats Shorts as a completely separate discovery surface from regular uploads. That means the 9:16 vertical aspect ratio isn’t optional — it’s the structural requirement for a video to qualify for and perform on the Shorts shelf.
Core Shorts Specifications
| Spec | Recommended Value |
|---|---|
| Aspect Ratio | 9:16 (vertical) |
| Resolution | 1080×1920 pixels (Full HD portrait) |
| Minimum Resolution | 720×1280 pixels |
| Maximum Length | 3 minutes / 180 seconds (extended from 60 sec in October 2024) |
| Frame Rate | 30 fps or 60 fps |
| Format | MP4 (H.264 + AAC); MOV also accepted |
| Thumbnail Size | 1280×720 pixels, 16:9, max 2 MB |
The 1080×1920 resolution is essentially 1080p rotated 90 degrees — the same total pixel count as a standard Full HD horizontal video, just reoriented for portrait viewing. YouTube currently serves Shorts at a maximum of 1080p to viewers regardless of source resolution, so uploading at 4K (2160×3840) for Shorts provides no perceptible quality benefit in playback. Upload at 1080×1920 and you’re already giving the platform everything it can use.
Note on Length: As of October 2024, Shorts support up to 3 minutes of content. The old 60-second limit was a frequent source of confusion. That said, research consistently shows that Shorts under 60 seconds perform better in the feed, and content longer than 60 seconds with active Content ID music claims may be blocked from Shorts classification until disputes resolve.
The Shorts Safe Zone — Where Your Content Needs to Live
This is the part that trips up creators who are new to vertical video. The Shorts player overlays persistent UI elements across the frame: a like/comment/share bar on the right edge, the creator’s username and caption at the bottom, and subscribe buttons near the top. If your text, face, or key visual lands under these overlays, it gets hidden — and you have no way to detect this unless you preview on an actual phone before publishing.
According to Hopper HQ’s Shorts dimension guide, the safe zone within the 1080×1920 frame is a centered 900×1350 px area, achieved by maintaining these margins:
- Top: 180 px margin (avoid placing important content here)
- Bottom: 390 px margin (heaviest UI overlay zone — captions, usernames)
- Left and right: 60 px margin on each side
In practice: frame your subject in the center third of the vertical frame, keep all on-screen text away from the bottom quarter of the shot, and never run essential titles along the top edge. This is a fundamentally different discipline from horizontal video where the lower-third is your safest text placement zone — Shorts flips that intuition entirely.
What Happens When You Upload the Wrong Dimensions
YouTube doesn’t reject incorrectly dimensioned videos — it tries to accommodate them, and the results range from “slightly awkward” to “completely unwatchable.”
A 4:3 horizontal video uploaded to the standard player gets pillar-boxed: black bars appear on both sides. A 9:16 vertical video uploaded as a regular video (not as a Short) gets letter-boxed with black bars top and bottom in the desktop player, though mobile may crop it. A horizontal video under 3 minutes doesn’t automatically become a Short — only videos that are at least as tall as they are wide (1:1 or taller aspect ratio) qualify for the Shorts feed. Upload a 16:9 landscape clip that’s 90 seconds long and it stays in the regular video feed, not Shorts.
If you regularly manage large amounts of video source files before publishing — keeping raw footage on a NAS or home server — it’s worth thinking about your local media workflow. A self-hosted solution like Immich for Synology photo and video management can help you keep original high-resolution files organized before you render the export at YouTube-optimized dimensions.
Comparing YouTube Shorts vs. Regular Video — Dimension Quick Reference
| Property | Standard Horizontal Video | YouTube Shorts |
|---|---|---|
| Aspect Ratio | 16:9 | 9:16 |
| Recommended Resolution | 1920×1080 (1080p) | 1080×1920 |
| Minimum Resolution | 1280×720 (720p) | 720×1280 |
| Max Resolution | 7680×4320 (8K) | 1080×1920 (served) |
| Max Length | 12 hours | 3 minutes |
| Preferred Format | MP4 / H.264 | MP4 / H.264 |
| Safe Zone Concern | Lower-third is safe for text | Avoid bottom 390px, top 180px |
Filming in 4K: The Dual-Format Advantage
One increasingly common workflow for creators who want to cover both Shorts and horizontal uploads without filming twice: record everything in 4K with your subject center-framed. A 4K frame (3840×2160) gives you enough resolution to crop a 1080×1920 vertical section from the center of the frame for a Short, while the full-width 3840×2160 source serves as the horizontal upload.
This only works cleanly if your subject stays within the center vertical strip during filming — wide-angle shots with subjects near the frame edges will crop poorly. But for talking-head videos, gear reviews, or any content where the subject is centered, it’s an efficient approach that eliminates the need to film separate takes for each format. Some cameras and phones now offer a split-screen recording mode that simultaneously captures both aspect ratios in a single file, though the quality of these implementations varies significantly by manufacturer.
If you run transcoding workloads locally — for instance, using Jellyfin or a similar media server to handle your video library — you’ll already be familiar with the computational cost of working at 4K. Load-balancing Jellyfin transcoding across Proxmox VMs with Intel QuickSync offers a useful model for thinking about hardware-accelerated encode pipelines, which applies equally to batch-rendering YouTube exports from a home server.
Export Settings for Common Video Editors
Most modern editors include YouTube presets, but knowing the underlying settings helps when a preset behaves unexpectedly or isn’t available for your target format.
For Horizontal YouTube Videos (1080p, 16:9)
- Resolution: 1920×1080
- Frame rate: Match source (usually 30 or 60 fps)
- Video codec: H.264 (for compatibility) or H.265 (for smaller files)
- Video bitrate: 8–16 Mbps at 30fps; 12–24 Mbps at 60fps
- Audio codec: AAC-LC, stereo, 192–320 kbps
- Container: MP4
For YouTube Shorts (1080×1920, 9:16)
- Resolution: 1080×1920
- Frame rate: 30 or 60 fps
- Video codec: H.264
- Video bitrate: 8 Mbps at 30fps; 12 Mbps at 60fps
- Audio codec: AAC-LC, stereo
- Container: MP4 or MOV
In DaVinci Resolve, you can create a custom export profile with these settings and save it as a render preset — then apply it to every project without reconfiguring manually. Premiere Pro’s Export panel includes a YouTube 1080p preset out of the box; you’ll need to manually swap the frame size to 1080×1920 for Shorts output, but the codec and audio settings carry over correctly.
For those who batch-process video files from the command line, storing footage on a self-hosted pipeline and encoding via FFmpeg is a practical alternative. If you’re already running automated backup and export workflows — for example, building a local media export pipeline with metadata preservation — the same principles translate well to automating YouTube-optimized video renders from a home server.
Thumbnail Dimensions — Don’t Overlook This
A complete upload checklist has to include the thumbnail. YouTube recommends 1280×720 pixels at 16:9 aspect ratio for all video thumbnails, including those on Shorts. File format should be JPG or PNG (PNG preferred for text-heavy graphics), and the file size must stay under 2 MB.
This 16:9 thumbnail spec applies even for Shorts, which is counterintuitive — the video itself is 9:16, but the thumbnail displays in 16:9 format in search results, channel pages, and suggested videos outside the Shorts feed. Keep your Shorts thumbnails in 16:9 and place the key visual in the center of the frame so it renders cleanly across both the Shorts shelf and regular search surfaces.
For the most current and complete upload specification details, YouTube’s official upload quality settings page is the authoritative reference — particularly worth bookmarking given that format support occasionally changes with platform updates.
Final Thoughts
Nailing your YouTube video dimensions is a one-time setup cost that pays off on every upload that follows. For standard horizontal content, 1920×1080 at 16:9 in an MP4 container covers the vast majority of use cases. For Shorts, 1080×1920 at 9:16 is the target — and observing the safe zone margins is critical if your videos include any on-screen text or lower-third graphics. The 3-minute Shorts extension (active since October 2024) gives you more room for storytelling, but the core dimension requirements remain unchanged.
If you’re building a content workflow that handles footage from capture through editing and final upload, it’s worth getting these specs locked into your export templates from the start. Changing aspect ratio mid-workflow after footage is already logged and cut is far more painful than setting the right sequence dimensions on day one. Know the target platform’s requirements, set your project up to match, and let the creative work be the only variable that changes from project to project.
For more on managing large video and media libraries locally before publishing — particularly if you self-host your asset storage — check out the guide to running a self-hosted media server for 4K content and how hardware transcoding options affect your render pipeline options at home.